Welcome
Please follow the steps below to begin using your e-gate
- The first step to using your new e-gate is to download the e-gate app. This app can be on both the Android PlayStore as well as the iOS AppStore. Once downloaded, you can log in using your GrasslandTools credentials. If you do not have a GrasslandTools account, you can sign up a new account.
- Once logged in, you will be able to pair to a new e-gate device. Ensure the device is powered on and that the Bluetooth functionality on your phone is activated. Select “Pair With New Device” and your phone will search for the e-gate.
- When your phone is paired to the device you will be able to schedule opening times, open on a timer, or open at the press on a button.
Opening options for e-gate
Within the e-gate app, you have three options for opening the latch: Schedule Opening, Timer, and Open Now.
- Schedule: Schedule future gate openings similar to setting an alarm on your phone. To set, select the time you wish the gate to open at and this time will be saved for future openings.
- Timer: The timer opening is set using a countdown. Set your timer in hours, minutes, or seconds. The app will start the count down and open the gate once it reaches zero.
- Open Now: With a simple push of a button, you can open your gate from anywhere in the world via our smartphone app. This is an instant opening.
Attaching the e-gate to a post
- Attaching the e-gate unit to a fencing post is a straightforward process, designed to ensure a secure and stable installation.
- Ensure there is a sturdy, upright fencing post for mounting the e-gate. Position the unit at the desired height, typically at a comfortable level for easy access and visibility.
- Take the ratchet-type strap included with your e-gate system and wrap it around the fencing post. The ratchet strap has a one-way tightening system. Pull the end of the strap until the round groove on the e-gate is tight against the fencing post. This is an important step as it prevents the unit falling down when the gate is released.
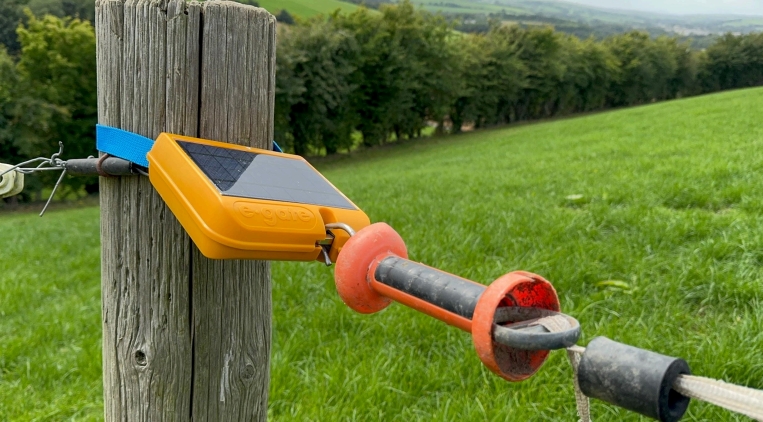
- The unit should be positioned on the post as seen below. The reason behind this position is to prevent any harm to the unit from cattle or machinery.

Connecting the fence current
- To have the current from the fence going through the gateway, the banana connector must be inserted into the red port on the bottom side of the e-gate.
- The cable used is included in the box. It has a crocodile clip on the other end, which is easily connected onto the electric fence.
- If you would like to see what voltage is going through your electric fence, you must put the black connector included in the box into the black banana connector on the back of the e-gate. On the other side of this connector is an earth spike, which must be stuck into the ground. Doing this will allow you to keep an eye on the voltage in the fence. The e-gate app will also automatically send you a notification if there is a sudden drop in fence voltage, alerting you of an issue in the fence line


